Hey! I recorded a video course!
If you like this article, you will also like the course! Check it out here!
Hello there (General Kenobi),
it’s been a while since the last blog post! Let me apologise with a ceremonial dad joke:
I can tolerate algebra,
maybe even a little calculus.

But geometry is where I draw the line.
Alright then! Today’s blog post is a very small cheatsheet for how to work with files in Livebook. Let’s get started!
🔗 Upload
Here’s a quick overview, the code is below:
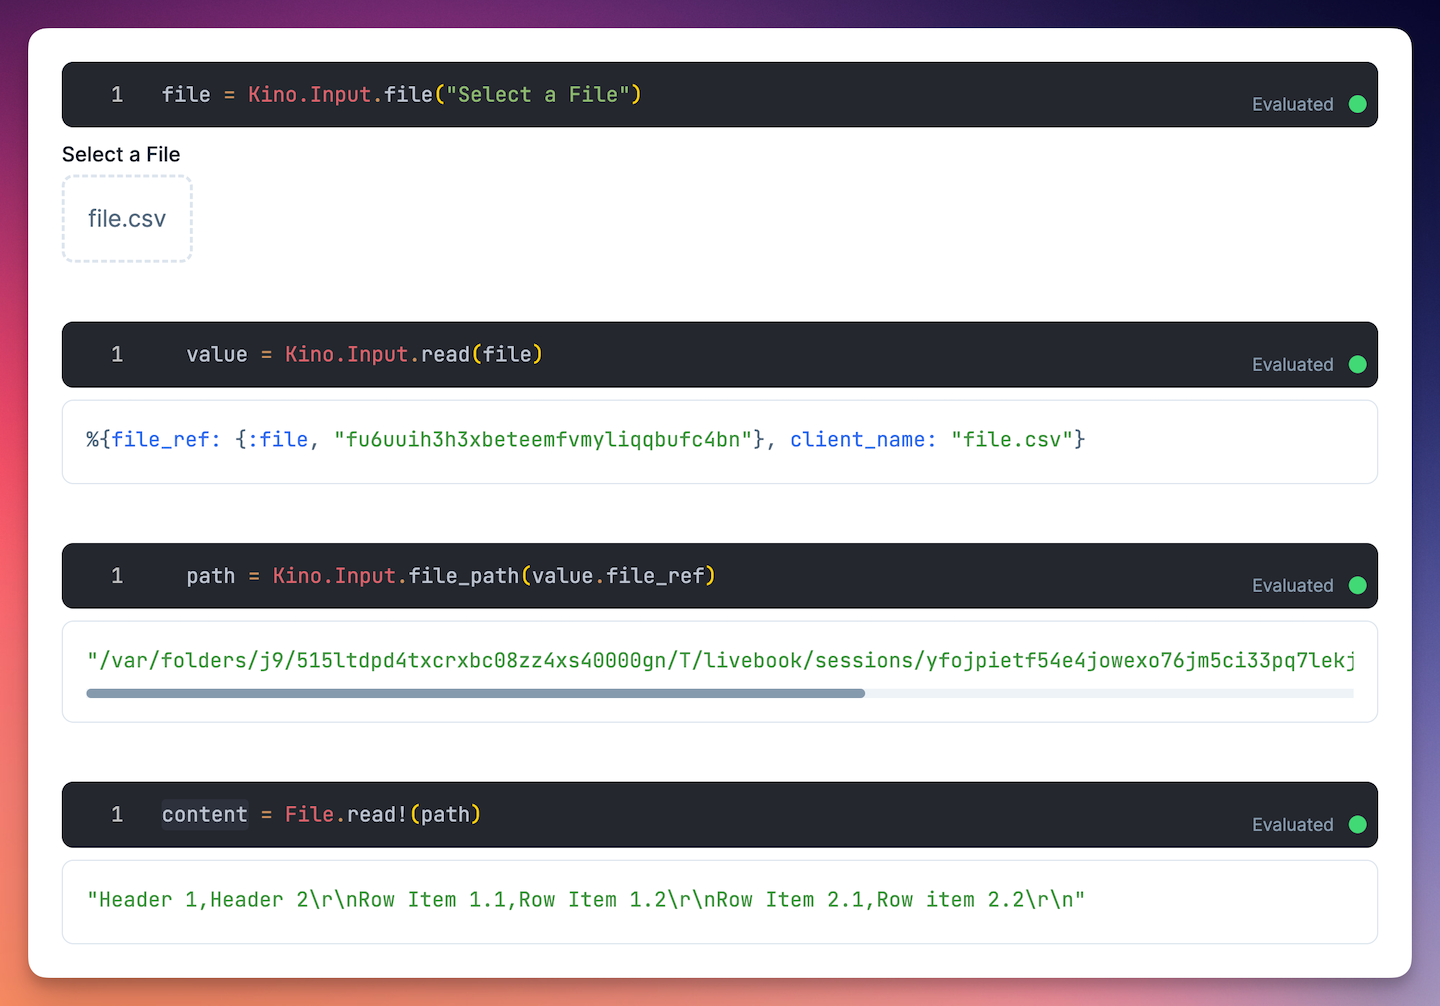
To upload a file to Livebook, you can use the Kino.Input.file/1 function. Simply create an Elixir code cell and add the function. Once you evaluate the code cell, Livebook will render a file uploader for you.
# Allow any kind of file upload
file = Kino.Input.file("Upload your file")

# Only allow CSV files
file = Kino.Input.file("Upload your file", accept: ~w(.csv))
The uploaded file isn’t a real “file” though, but only contains a reference to the upload. You always have to call Kino.Input.read/1 first to get any kind of data.
> value = Kino.Input.read(file)
%{
  file_ref: {
    :file,
    "fu6uuih3h3xbeteemfvmyliqqbufc4bn"
  },
  client_name: "file.csv"
}
Now, you have a reference to the file and its filename. You can read its contents like this:
# Get the full filepath
> path = Kino.Input.file_path(value.file_ref)
"/var/folders/j9/long-string/T/livebook/sessions/long-string/registered_files/long-string"

# Read the file contents
> content = File.read!(path)
"Header 1,Header 2\r\nRow Item 1.1,Row Item 1.2\r\nRow Item 2.1,Row item 2.2\r\n"
Unfortunately, I haven’t figured out how to upload multiple files at once yet. The Kino.Input.file/1 function only allows a single file upload, but if you know a workaround, please tweet at me!
Now you have the file contents in memory! You probably want to process the contents somehow, so let’s look at that next.
🔗 Process
How you’ll process the file contents depends on your use case and the file type. In this example, I have a simple CSV file through which I want to iterate. I’ll use the CSV library for that. This is an overview, the code is below:
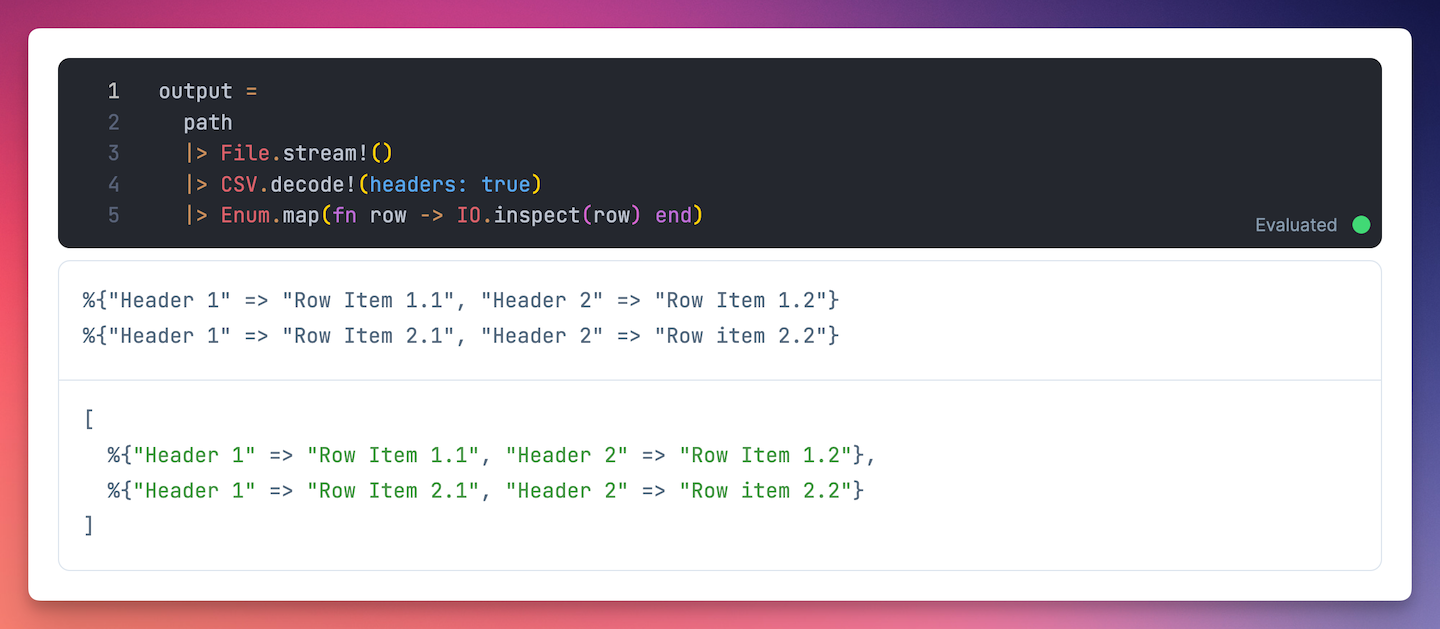
> output =
    path
    |> File.stream!()
    |> CSV.decode!(headers: true)
    |> Enum.map(fn row -> IO.inspect(row) end)
[
  %{"Header 1" => "Row Item 1.1", "Header 2" => "Row Item 1.2"},
  %{"Header 1" => "Row Item 2.1", "Header 2" => "Row item 2.2"}
]
In this code, I open a File.stream!/1 to the file, which reads the file line-by-line instead of loading everything into memory at once. I then decode the string content to CSV data and iterate over every row. I use the headers: true option to tell CSV to give me a map with the table headers as map keys. This prevents issues when e.g. the order of the table headers changes. The map keys here will always stay the same regardless of their order in the table.
Next, let’s see how we can download a file that contains our processed output!
🔗 Download
To download a file, you can use the Kino.Download.new/2 function. It expects a string based content though, so we can’t simply pass our list of maps into it. We first have to encode our CSV data again and merge everything into one long string. Here’s an overview, the code is below:
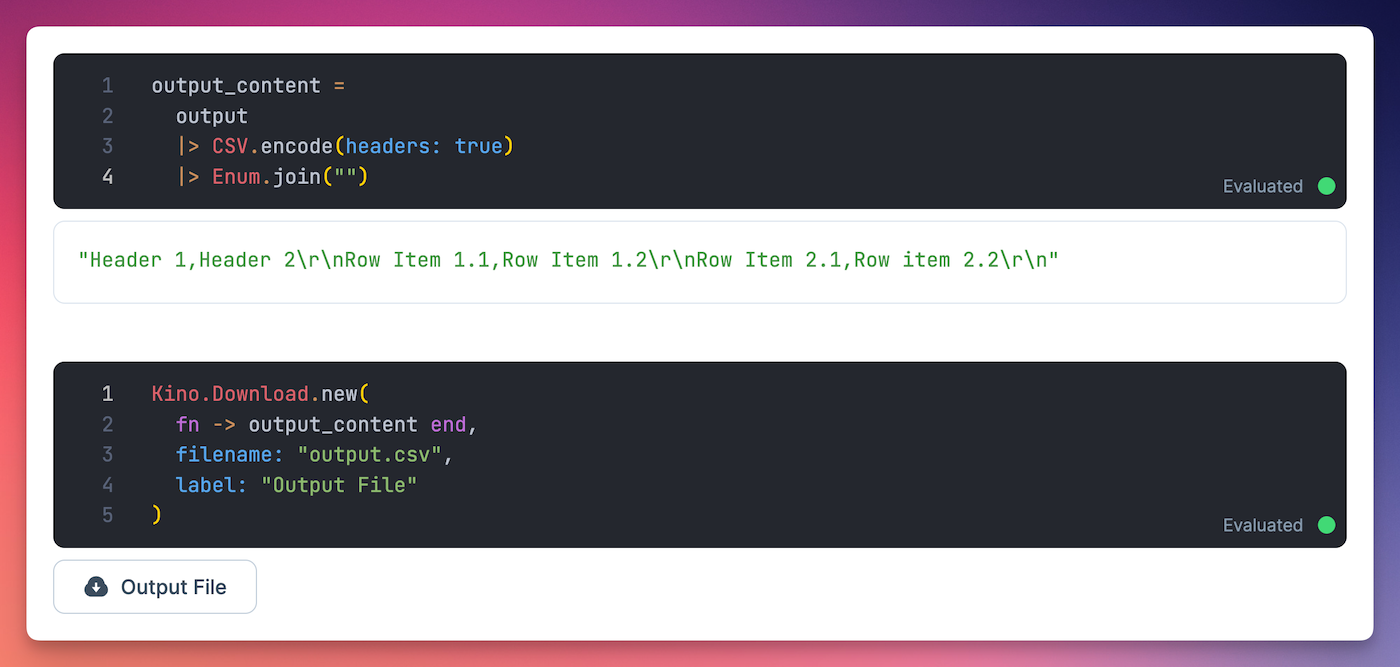
First, we need to merge our output CSV data into one long string. We can do that like this:
> output_content =
    output
    |> CSV.encode(headers: true)
    |> Enum.join("")
"Header 1,Header 2\r\nRow Item 1.1,Row Item 1.2\r\nRow Item 2.1,Row item 2.2\r\n"
Now, we have a long string in our output_content variable. Notice that CSV.encode/2 adds the necessary \r\n suffixes after every line. When we download the file, these line breaks are respected and we’ll receive a properly formatted CSV file back.
Here’s how we create the download:
Kino.Download.new(
  fn -> output_content end,
  filename: "output.csv",
  label: "Output File"
)
Livebook will render a little download button where we can download the file with the filename output.csv.
🔗 Conclusion
And that’s it! I hope you enjoyed this article! If you want to support me, you can buy my book or video course. Follow me on Twitter or subscribe to my newsletter below if you want to get notified when I publish the next blog post. Until the next time! Cheerio 👋